*I am an Amazon associate. I earn a small commission if you click on the link below and purchase the product. There is no additional cost to you. Thanks for supporting our website.
If you don't have bug screens...read on!
Van Essential Rear Door RAM Promaster Full Bug Screen
Van Essential Rear Door RAM Promaster Bug Screen with Privacy
Van Essential Sliding Door RAM Promaster Bug Screen (not available as of this posting)
Why Invest In Bug Screens
Simply put, because bugs are annoying when you are trying to relax or sleep in your van. There is nothing worse than a fly or mosquito buzzing around your van on a hot summer evening.
You don’t want to shut your doors and block out the light and gorgeous views do you, but that is your only option if you don’t have screens. I mean sure you can hang blankets over your doors, but at that point you mine as well shut your doors.
Screens convert your van into an amazing outdoor living space where you are free to enjoy everything that brought you to your destination. Additionally, vans can hold onto a lot of the daytime heat that builds up between you van’s exterior and your insulation. Why not sleep with the doors open and the screens rolled down for a good night sleep.
Open up your van and make it feel bigger. Enjoy the outdoors from inside your van. Get some bug screens and let us know how it has changed your van life experience.
Why Choose Van Essential
In a word, quality. After purchasing our Van Essential window shades and experiencing the difference they made and their top notch quality, it was a no brainer to continue with that company. They did not let us down.
Their bug screens are light weight yet strong. The zippers are very sturdy and easy to use. The fastening buckles keep the screens secure and out of the way when rolled up. The strong earth magnets keep the bottom of the screens securely in place. Most importantly though, they keep the bugs out!
Installation
This is where it gets a bit tricky. I am not going to sugar coat this, they are not a simple install. After reading reviews of various company’s bug screens, it seems it is a common complaint. Let’s go over the steps involved and see why it might not be a do it yourself project for everyone.
When I first was imagining the install process, I thought it was as simple as taking off the rubber door seal. Clipping on the screen and putting the door seal back on. Now let’s take a look at my actual process. I highly recommend you watch the You Tube install video by a company called Bug Wall. They do a great job of walking you through the entire process. Sorry Van Essential, but your video is much too short and skips through a lot of the challenging steps.
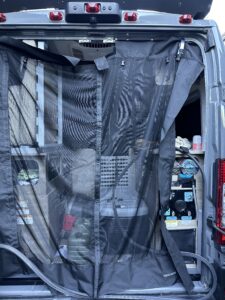
Rear Door Screen (I suggest starting with the rear and keeping the screen zipped closed)
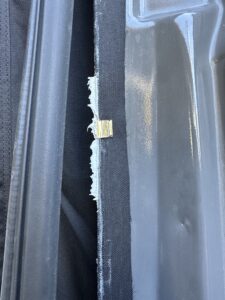
- Remove the upper seal and wipe off the thick white sealant that they use to adhere the seal to the van. This stuff is MESSY and will get everywhere if you are not careful. The sealant is white and your screen is black. Need I say more?
- Using the two provided spring clamps, secure and center the bug screen to the top of the the back door opening and adjust the screen so it drops an inch or so below the the floor.
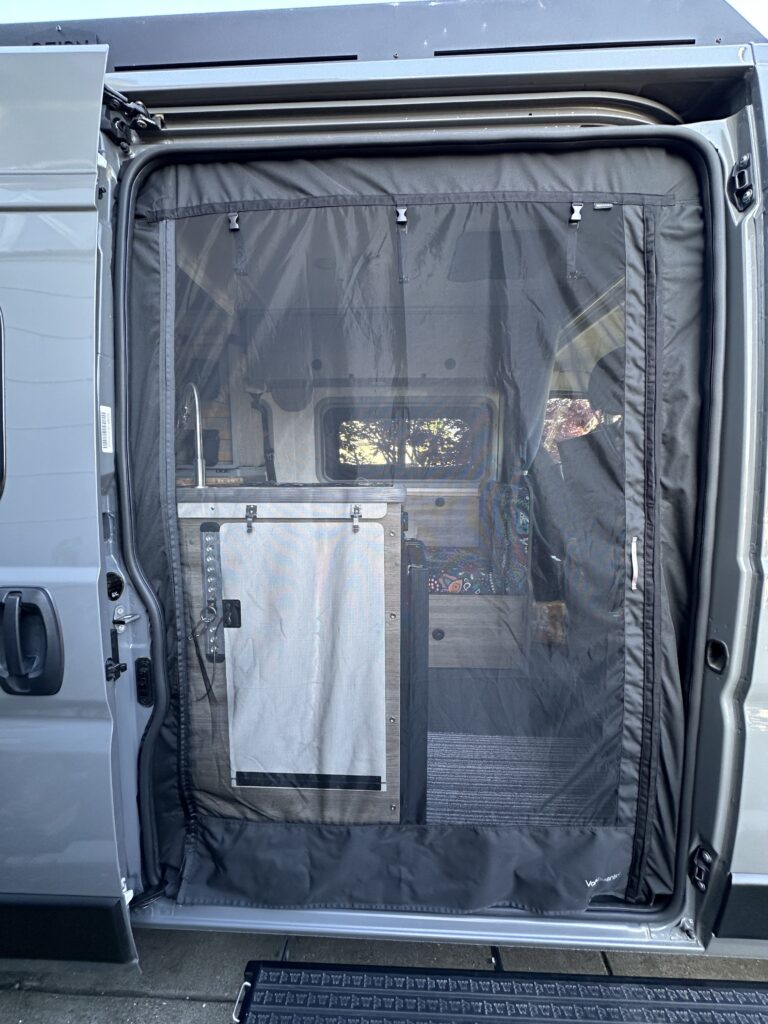
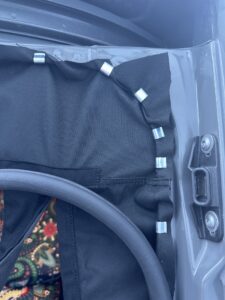
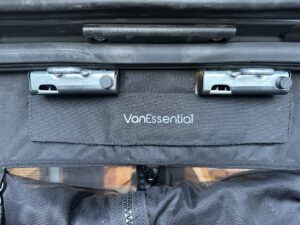
- Starting at the upper center of the screen, apply a few clips 5-6 inches apart. Depending on the thickness of the metal, use the appropriate size clips. You may need a small hammer to tap them on. As you apply the clips, make sure the bug screen is still hanging at the desired length. See my picture of the location of the top middle of the screen. It needs to be high enough to seal gaps around the door latches.
- Work your way out to the corners. This is where it gets tricky. The material will bunch up as you work your way around the corners. See my picture. Take your time and place the clips closer than you do on the straight areas of the door.
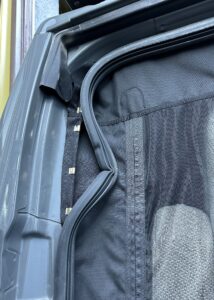
- When you feel good about the top screen placement start to push the seal back on. Make sure not to pull on the seal as you will end up with too much and the seal will buckle. See my picture.
- Now take off small areas of the seal as you work your way down applying clips and wiping off the white sealant as you go. Make sure the screen is not too tight or you will have trouble zipping it. Once you complete one side, follow the same steps for the other side.
Tips: Have a few clean rags for wiping off the white sealant goo. Keep the screens zipped closed as you install them. Set the screen height before you start. Make sure the screens are long enough to rest on the floor or hang slightly over it. Make sure the slider door screen does not interfere with the lower door mechanisms.
Now take you new found skills and tackle the side door.
Features
- Easy entry and exit with strong rare earth magnetic closure and a handle on the sliding door screen.
- Fine mesh keeps bugs out while not obstructing your view.
- Strong easy to use zippers.
- Custom fit for your van’s make and model.
- Strong metal clips come in two sizes to secure your screen to your van’s varying metal thickness.
- Quick release buckles make it easy to secure and release your screens.
- Made from recycled UV protected material.
Real World Use
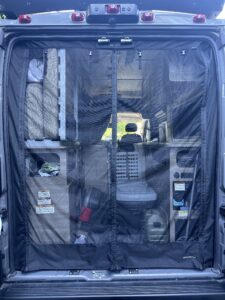
We feel like we have turned our van into a screened-off living area. The van feels so much bigger when we have the doors open and the screens rolled down. The screens still give us great views of our beautiful surroundings. Once the screens are closed not a single bug gets into the van.
If bugs come in when we enter the van, we either pick them off one by one or remove the screen from our roof fan and turn it on full blast so it pulls air and the bugs out.
The only con we have found is that they are a bit difficult to get rolled up tight if you don’t have a helper to roll one side while you roll the other.
Our Conclusion
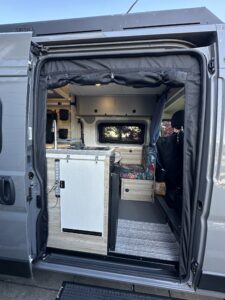
Once installed we are extremely happy with how easy they are to use and stow away. While they do hang down a bit from the ceiling when rolled up, we love having the entire door area open and free from screens when not in use. Our Promaster Winnebago Solis Pocket came with terrible screens that didn’t seal well at all and were always blocking our view when we were not using them. We love this product and hope you will too.
Van Essential Rear Door RAM Promaster Full Bug Screen
Van Essential Rear Door RAM Promaster Bug Screen with Privacy
Van Essential Sliding Door RAM Promaster Bug Screen (not available as of this posting)
Van Essential Front Doors RAM Promaster Bug Screens
If you have any questions or comments about this product, please submit them in the comments section below.
Sign up for our NEWSLETTER so you never miss out on what’s going on at Get Off The Log. Plus you will be the first to receive our latest campground and product reviews.
Pingback: Sandy Flat & Rocky Point Campgrounds, Kern County Ca
Pingback: Stanislaus National Forest, Service Road 7N17 California
Pingback: Van Upgrades List - Get Off The Log